Back button focus is a really handy technique to use on your DSLR camera. In this post I will answer these questions:
- What is back button focus?
- Why should you use it?
- How do you set up back button focus on a Nikon D5200?
What is Back Button Focus?
Back button focusing assigns your cameras Auto Focus to a button on the back of your camera. This separates the focusing from the shutter release which can be helpful for a couple of reasons.
Why should you use it?
1 – You don’t have to switch focus modes
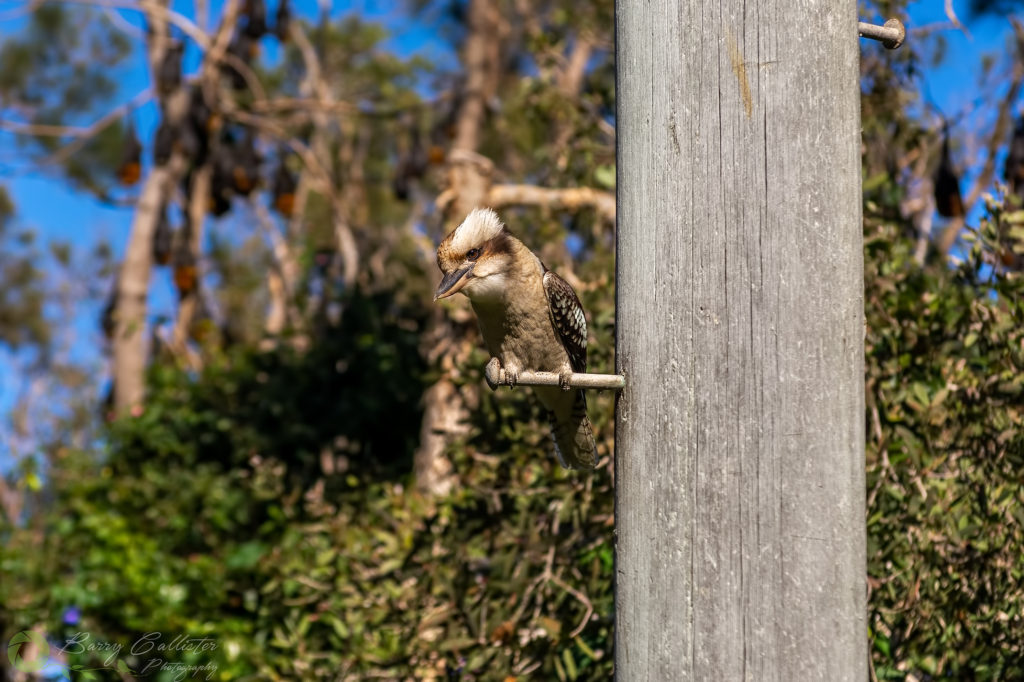
Imagine you are taking a photo of a bird perched on a post such as the photo on the right.
You would probably have your camera in Single-servo AF mode or AF-S. You press the shutter button down halfway to focus and then press it fully to take a shot.
This works great if the bird stays still but what if it suddenly flies off?
If it does, you then have to quickly switch to Continuous-servo AF or AF-C so that you can track it’s movement. By the time you’ve done this, the bird is most likely gone.
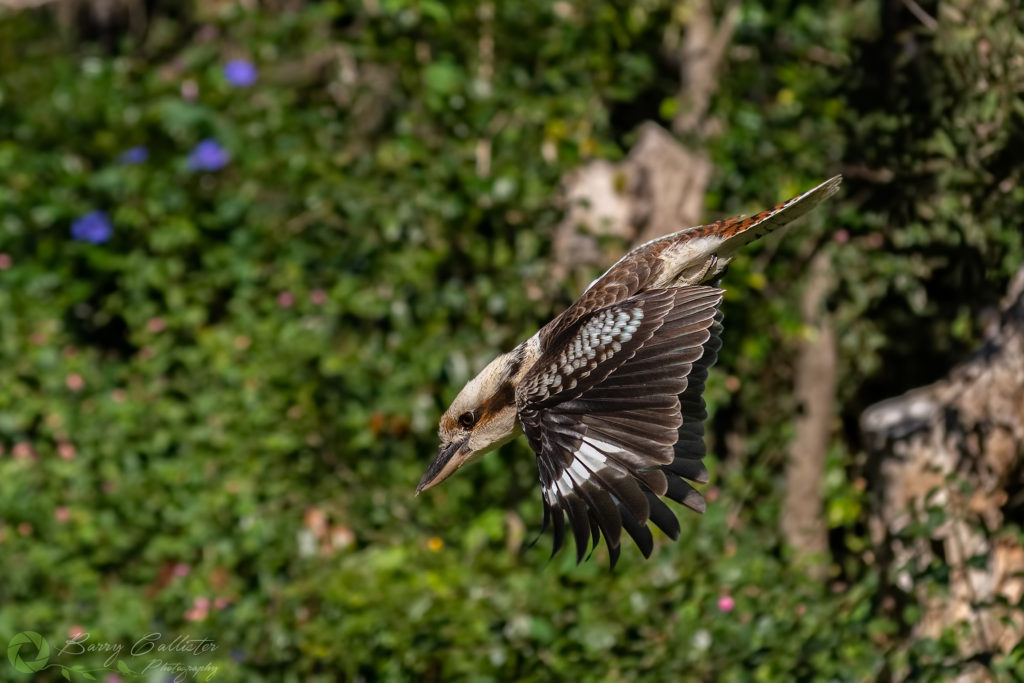
With Back Button Focus on, you can start in AF-C mode and leave it there all the time.
You simply press the button once to focus on the bird and take your shots.
If it takes flight, you press and hold the button to enable the camera to continuously focus on it. If you keep the focus point on the bird, you should then capture amazing photos of it in flight.
2 – You can easily focus and recompose
Another example where this technique is good is focus/recompose.
This is where you might be taking a photo of the same bird but you want to have it in the right of frame to include more of it’s surroundings. You press the shutter button halfway to focus, move the camera and then your finger slips and you’ve lost focus.
With back button focus, you simply press the button once, recompose the shot and then click the shutter button. Once you’ve pressed that back button, the camera will lock that focus and you don’t have to worry.
How to set back button focus
Setting Back Button Focus will be different for most every camera model. Here I will show you how to do it on a Nikon D5200.
If you want to, you can watch my YouTube video Back Button Focus Nikon – What Is It And Why Do You Want To Use It? In that video I explain how to set it up on the Nikon D5200.
For instructions on doing it with your camera head to Google.
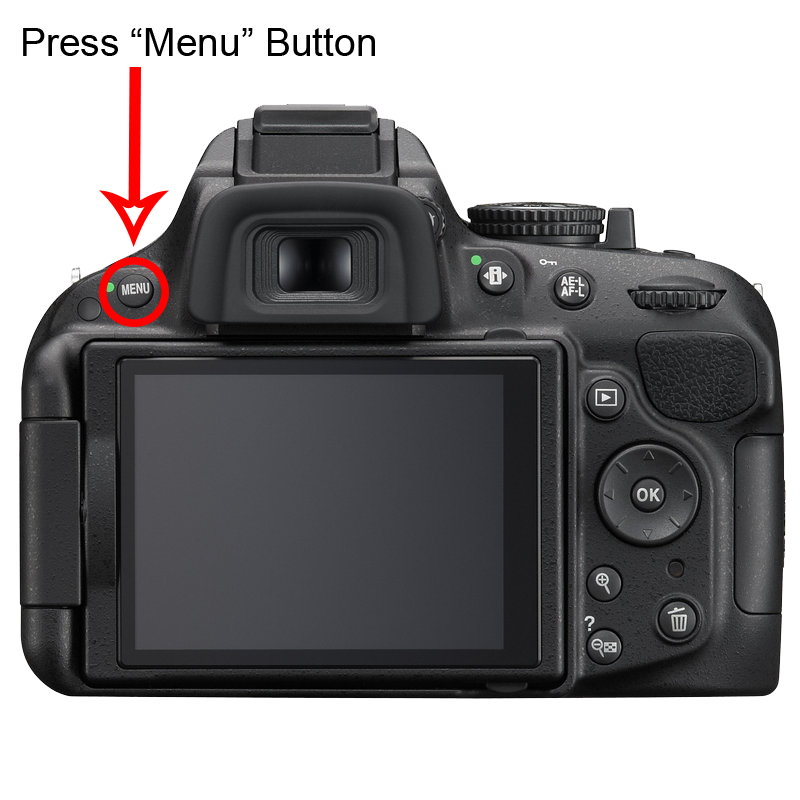
- First press the Menu button
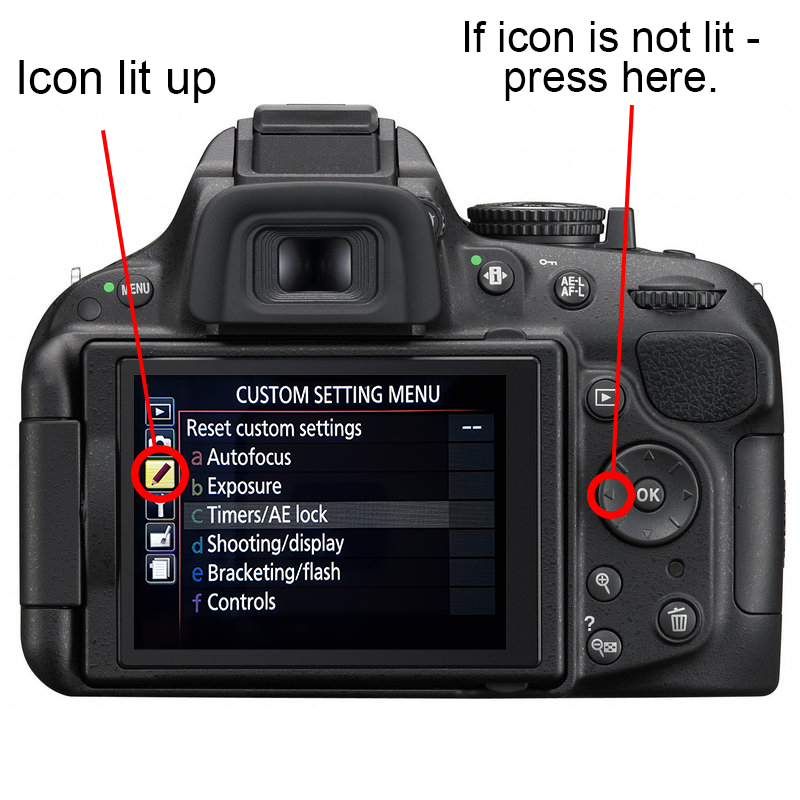
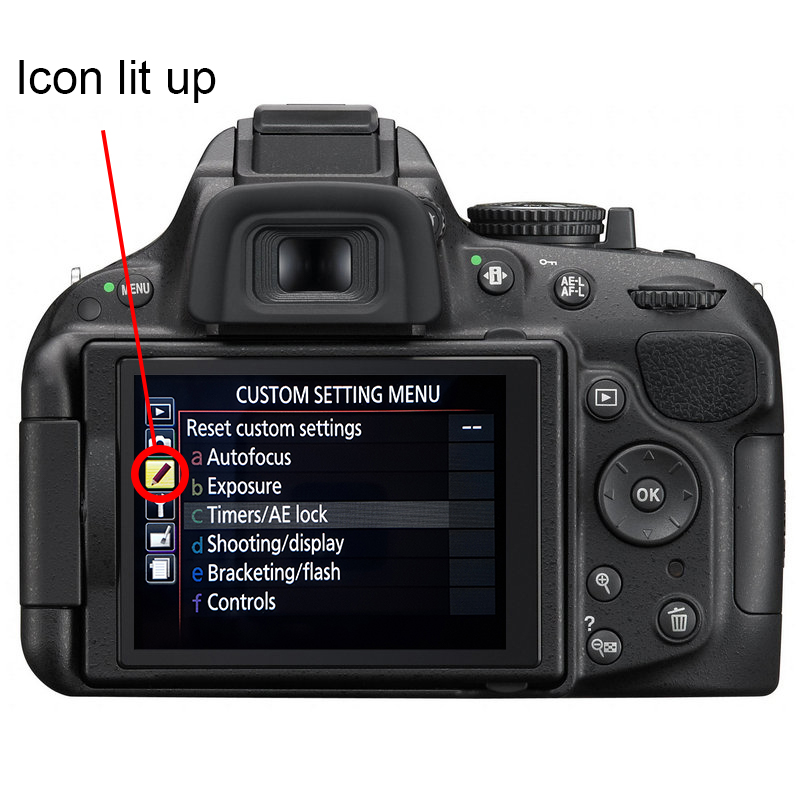
- Make sure one of the little icons on the left is lit up. If not, press the left side of the Selector Switch.
- Scroll up or down using the Selector Switch until the little pencil icon is lit up. This is the Custom Setting Menu.
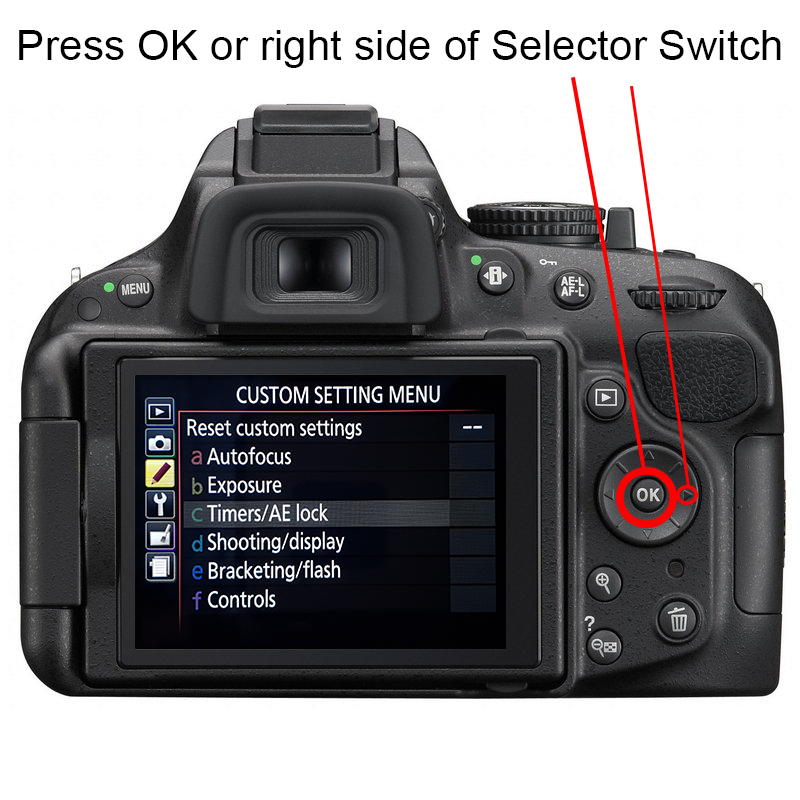
- Press the OK button or right side of Selector Switch.
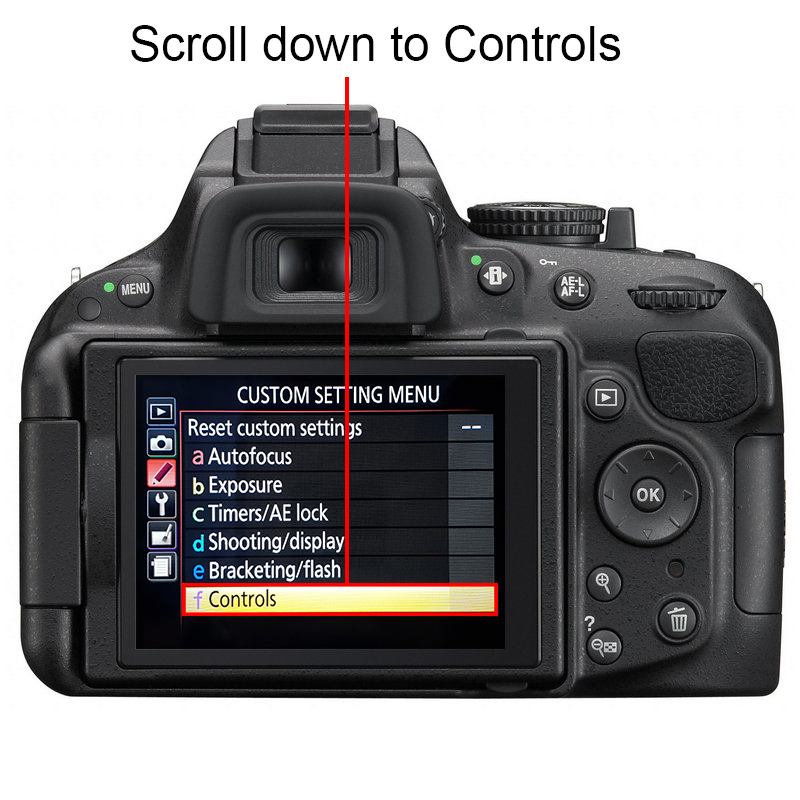
- Scroll down to f Controls using the selector switch.
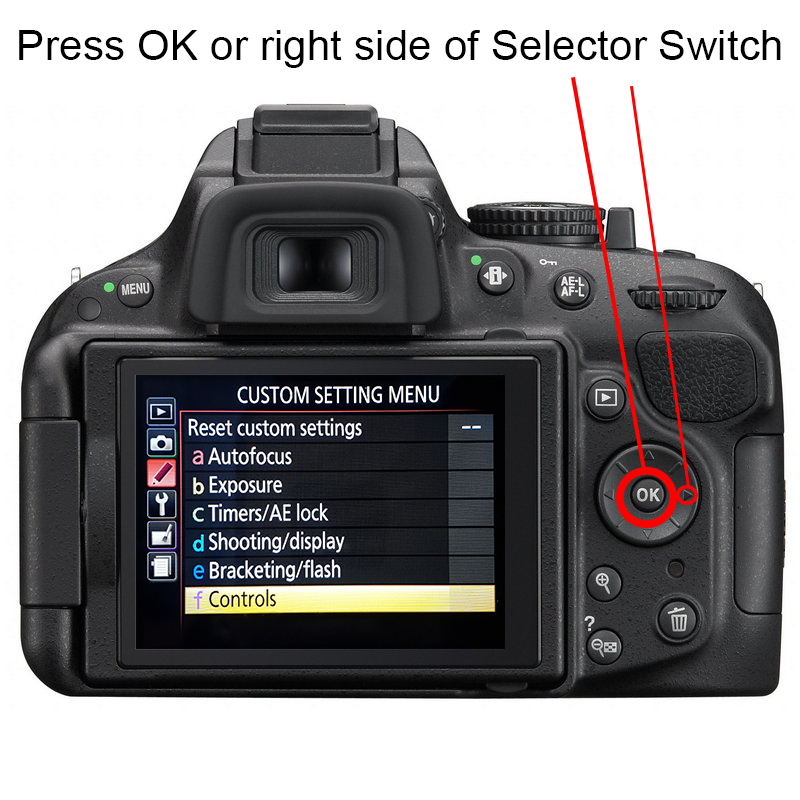
- Press OK or the right side of the Selector Switch.
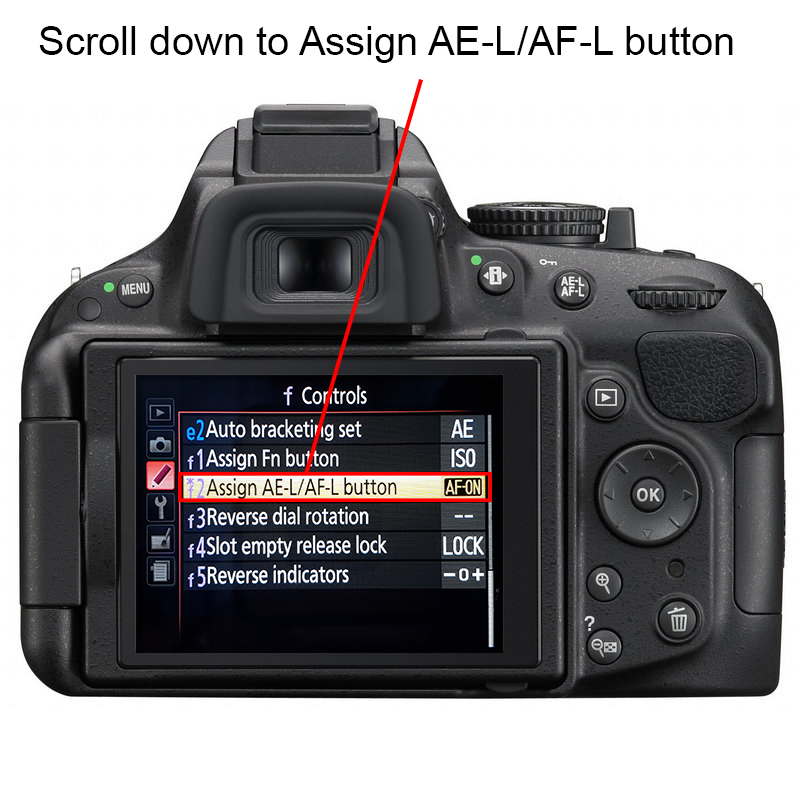
- Scroll down to Assign AE-L/AF-L button.
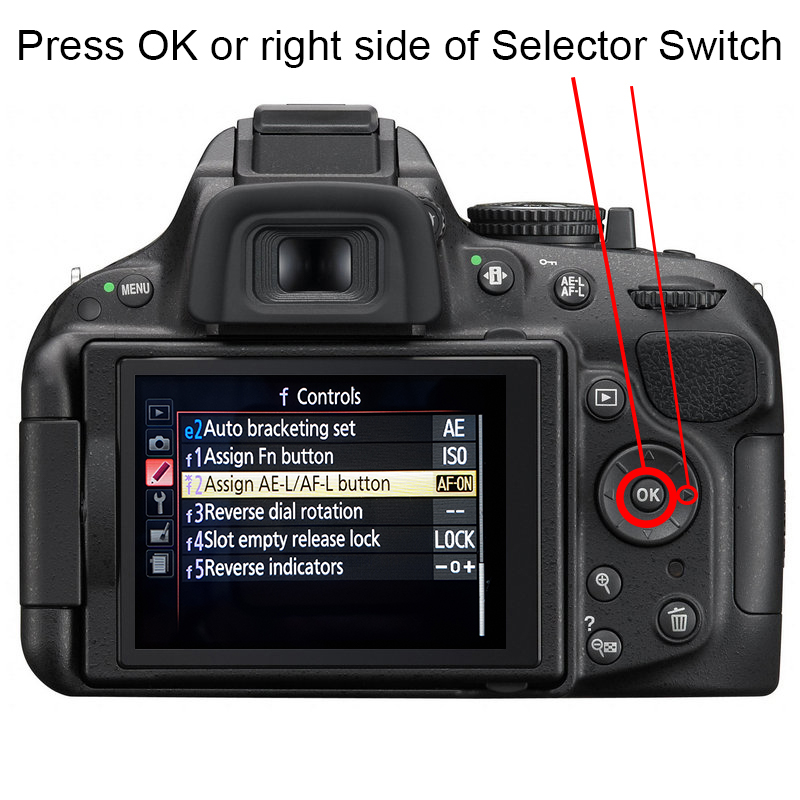
- Press the OK button or right side of the Selector Switch.
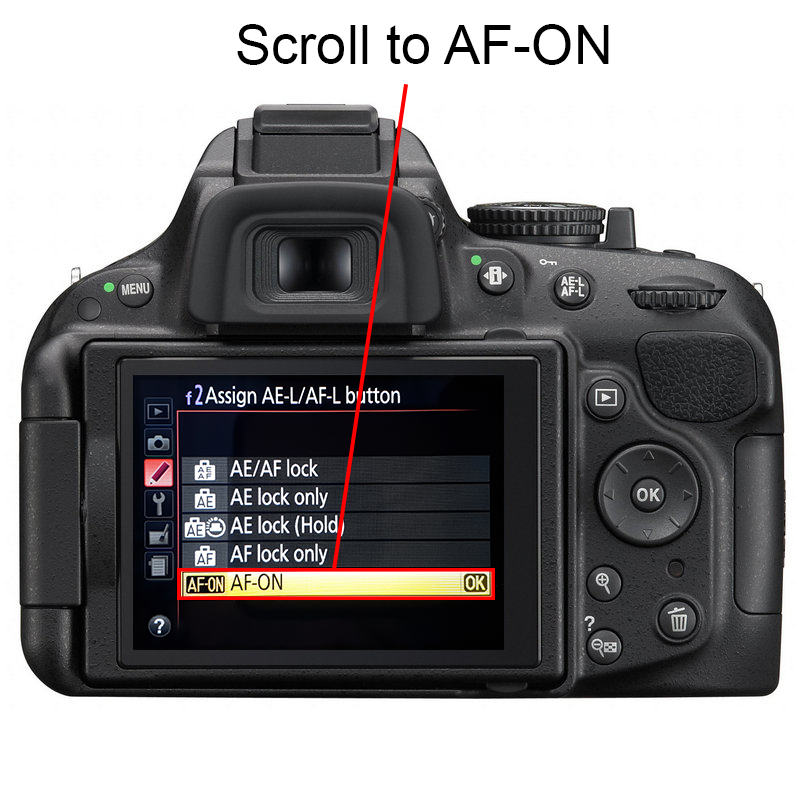
- Scroll down to AF-ON using the Selector Switch.
- Press OK or right side of Selector Switch to apply it.
You have now set Back Button AF
You have now assigned your Auto Focus to the AE-L/AF-L switch on the back of the camera. You’re using Back Button AF.
It is possible that once you have used Back Button AF for a little while that you find it doesn’t work for you. That’s fine. Not every technique works for every person.
If this is the case for you, follow the steps above to reset your AE-L/AF-L button back to it’s default setting.
I have been using Back Button AF for years now and I will never go back. For wildlife photography it is really useful. I hope that you find it useful too. If you do, please leave a comment below to let me know.
Thanks for reading this blog post. Please share it on social media using the buttons below.
Another blog post of mine that might interest you is my 5 Landscape Photography Tips post. This is a great read to help you improve your landscape images.


