Do you want to know how to use the self timer on a Nikon D5200? Of course you do, that’s why you’re here!
In this short blog post I am going to show you how to use the self timer and give you some tips for using it to.
Where To Find The Self Timer On The Nikon D5200
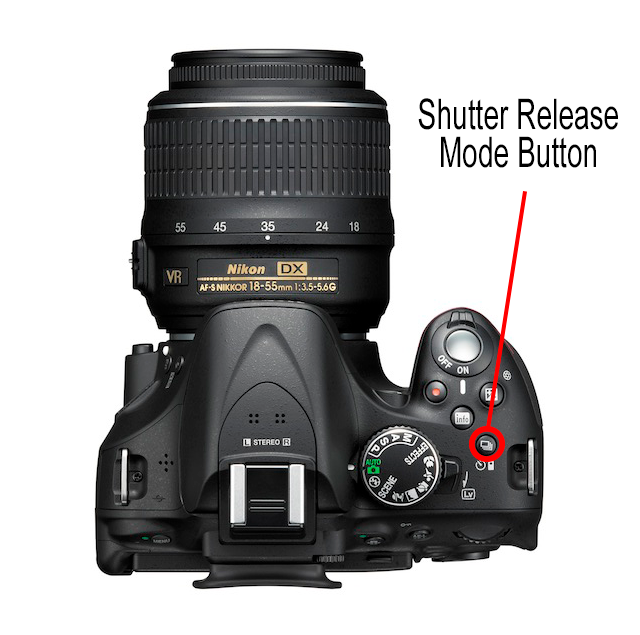
The self timer can be found by pressing the Shutter Release Mode on the top of the camera.

Once you have pressed the Shutter Release Mode button, you should see this on the LCD screen……..

This is the Release Mode screen. It is here that you can set the controls for how the camera releases the shutter. The option that we are concerned with is the one on the right in the top row. It has a timer symbol and 10s written next to it. This indicates that it is set for a 10-second-delay release.
Yours may say something other than 10s, however don’t be concerned with that at the moment.
How To Select The Self Timer
Press the right side of the Selector Switch to move across and select it (so that it lights yellow). If you now click the OK button, you will have selected your self timer.

When you press the shutter button now, the camera will start beeping and you will have 10 seconds to get into the shot before it takes a photo!
If your Self Timer icon displayed something other than 10s, this simply means that it was set for a different time value. Watch the video below to learn how to change that setting.
The video also gives you some tips about using the Self Timer and how to get good focus when you are shooting alone.
You’re All Set To Take Selfies!
Now you know how to set up and use the self timer on the Nikon D5200, you should be able to take some great shots of yourself.
For more how-to’s regarding the Nikon D5200, see my YouTube channel.
Thanks for reading my blog today, I hope you learnt what you came here for. Please share this with anyone else you know that has a D5200 or other similar Nikon DSLR camera.


