The Lasso Tool in Photoshop is one of my favourite ways to select things. If you are skilled with your mouse, you can use the lasso to select pretty much anything.
In this post I will explore the Lasso Tool in detail and give you some tips for using it.
Where To Find The Lasso Tool in Photoshop
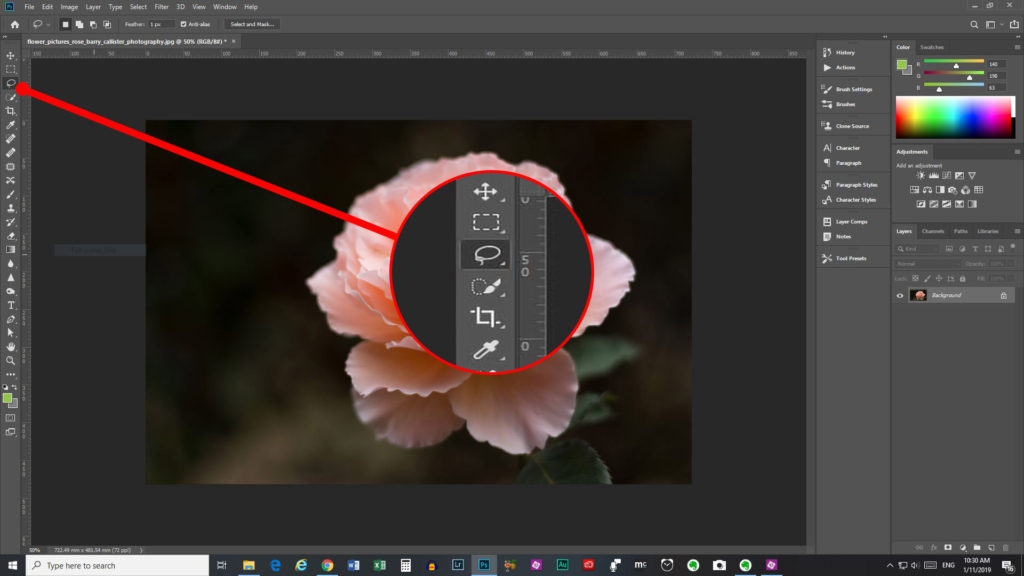
The image below shows you where to find the Lasso Tool. It is over on the left-hand-side of the Photoshop work-space, the 3rd icon down from the top. It’s a picture of a lasso, you can’t really miss it!

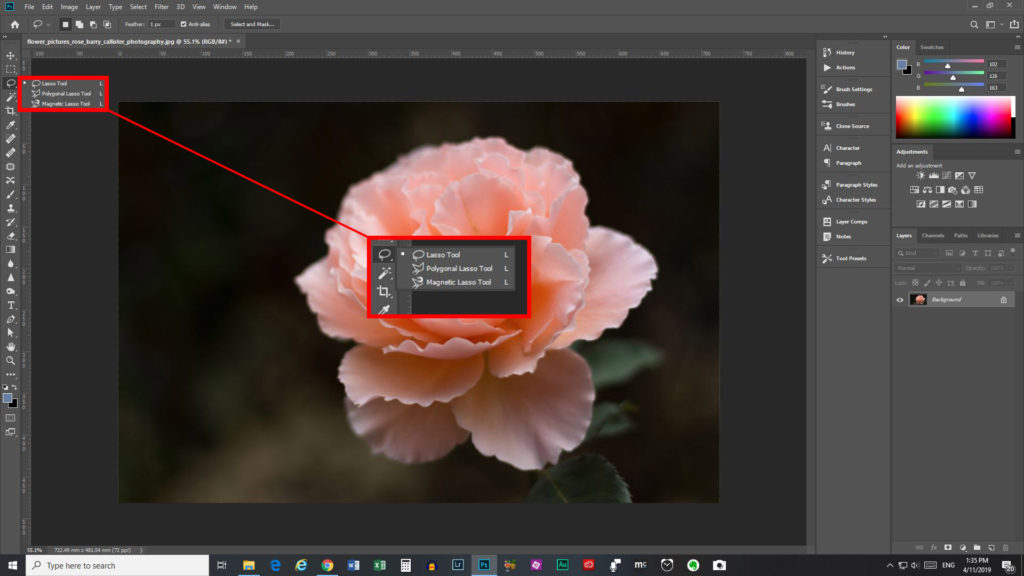
Within the lasso tool you have 3 options. If you long-click on the icon, or right click it, you will see these options pop out.
You have a choice of either the Lasso Tool, the Polygonal Lasso Tool, or the Magnetic Lasso Tool.

3 Choices Within The Tool
Let’s have a look at the three different types of Lasso tool and what they all do.
- The Lasso Tool – this is the generic type of lasso. Use this tool for selecting curves, or irregular shapes with curved edges. Watch the video below for a quick run-down on the lasso tool.
- The Polygonal Lasso Tool – this tool will help you select things with straight edges that are irregular-shaped. Watch the video below for a run-down of how to use the Polygonal Lasso Tool.
- The Magnetic Lasso Tool – this tool can help you select pretty much any shape, as it “magnetizes” to the edges of what you are selecting. This tool is a beast of it’s own, so I will cover it in another blog post.
Now You Know More About The Lasso Tool
Hopefully, this blog has given you more information about the Lasso Tool in Photoshop. The 3 types of lasso can help select pretty much anything.
Another great and really simple way to select in Photoshop is the Quick Selection Tool. I have done another post about this tool that you can read here. If you prefer to watch a video, check out my How To Use The Quick Selection Tool In Photoshop Youtube video.
Please share this post with other people who may get value from it. We learn and grow together. There are social media share buttons below. Thanks for reading.


